|
|
|
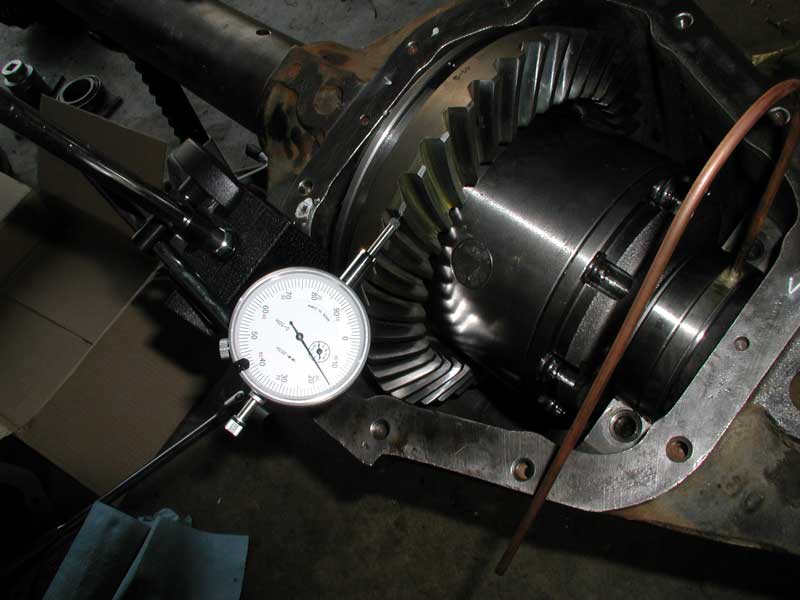 |
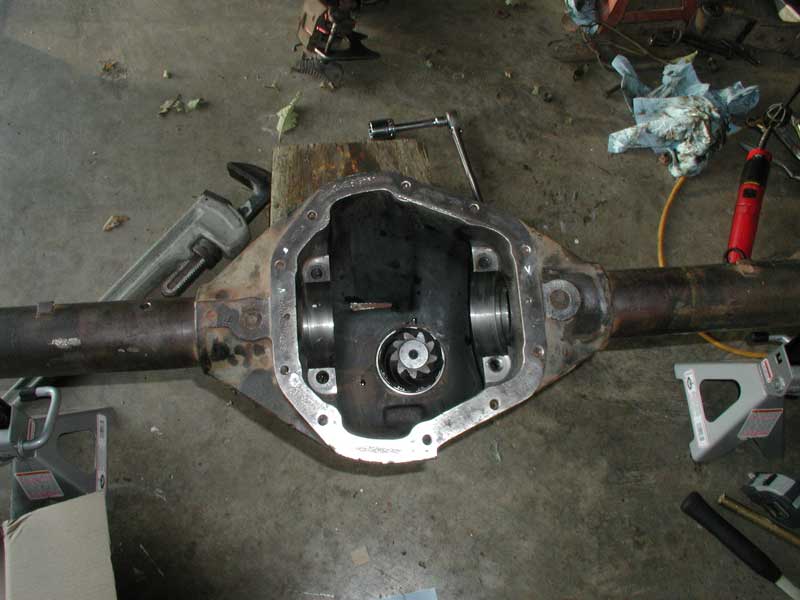
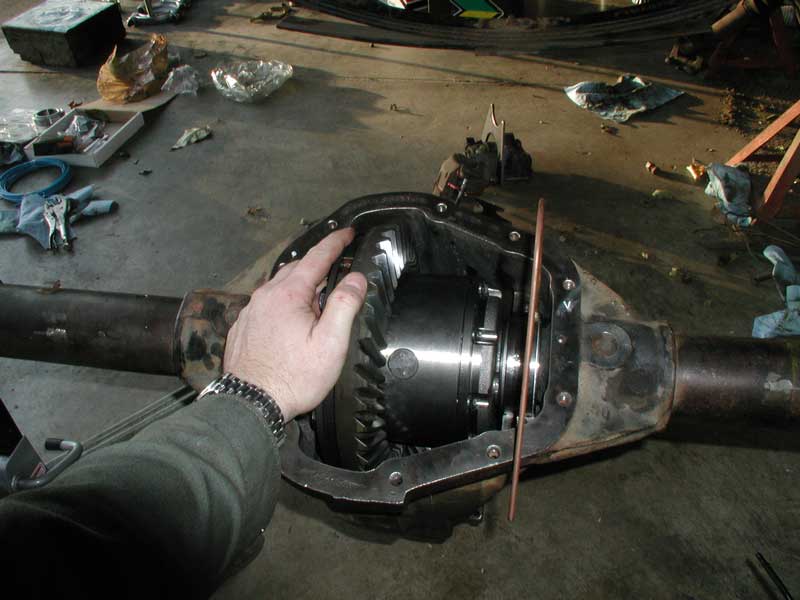
Backlash..... Basically backlash is a term that describes how tight the gears are meshed together. It's measured with a dial indicator on a tooth of the ring gear. Hold the pinion tight, and rock the ring gear back and forth. The amount of movement is the Backlash. Typically this should be .006 - .010. In my case, I already know it's off, because of the rule of thumb technique: If you can hear/feel it, but not really see it, then it's close. I still would like to know how much it's off. I setup the dial indicator with the magnetic base and took a reading. Backlash was about .018". |
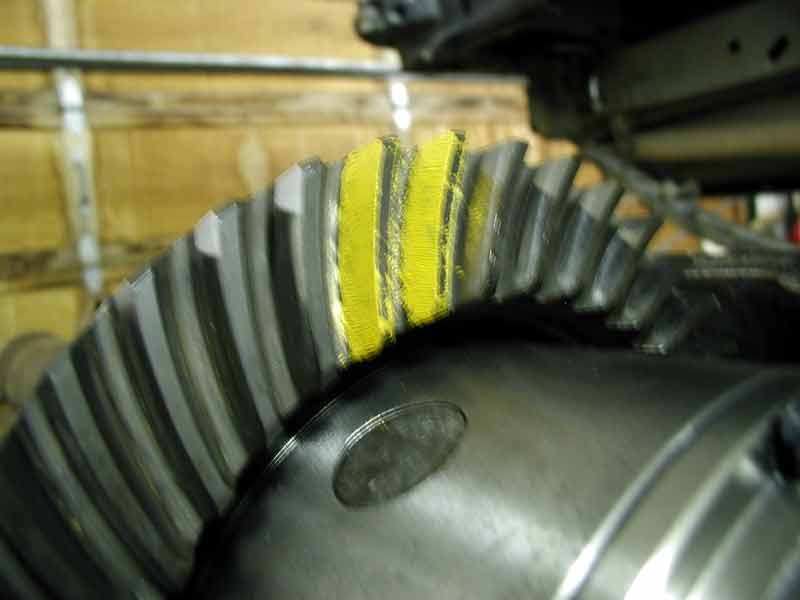 |
Now for the fun part! Paint a couple teeth on the ring gear. Then apply some resistance to the ring gear and turn the pinion. Let the paint pass by the pinion a couple times in each direction. It's important to apply resistance to the ring gear. |
 |
The master install kit comes with a tiny drop of gear marking compound. This just won't do! It's too much fun, we need more. If you go to your local GM dealer, you can pick up a whole tube for a few bucks! |
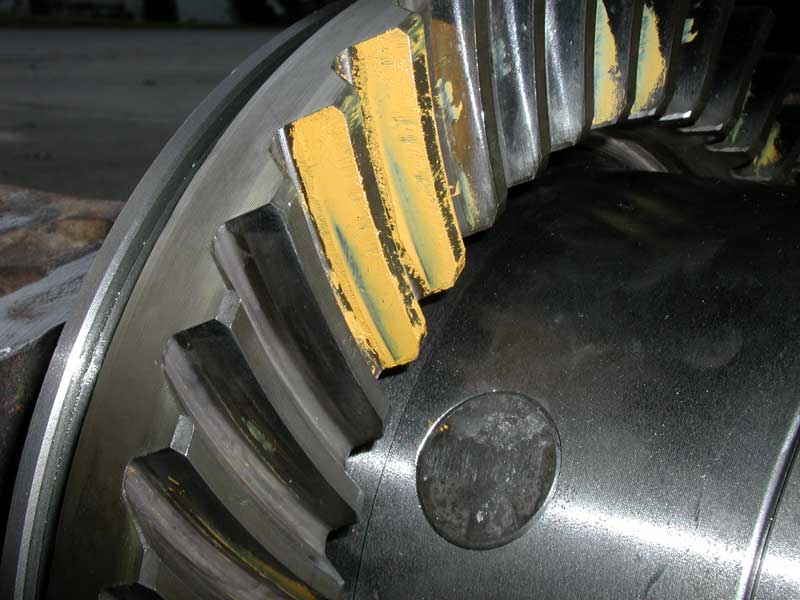 |
Here's what we've been
waiting for. Unfortunately we didn't get it on the first try. Reading the pattern is the key to know what adjustments to make. The idea is to get a nice broad/rounded pattern centered on the tooth on both the drive and coast side. Unfortunately it doesn't always work out that perfect. The most important part is that the pattern be centered between the root and top of the tooth. This is the Drive side of the tooth. Notice how deep the pattern is. It's also rather narrow with sharp edges. It's also offset toward the toe of the tooth.. This pattern indicates that the pinion is too close. |
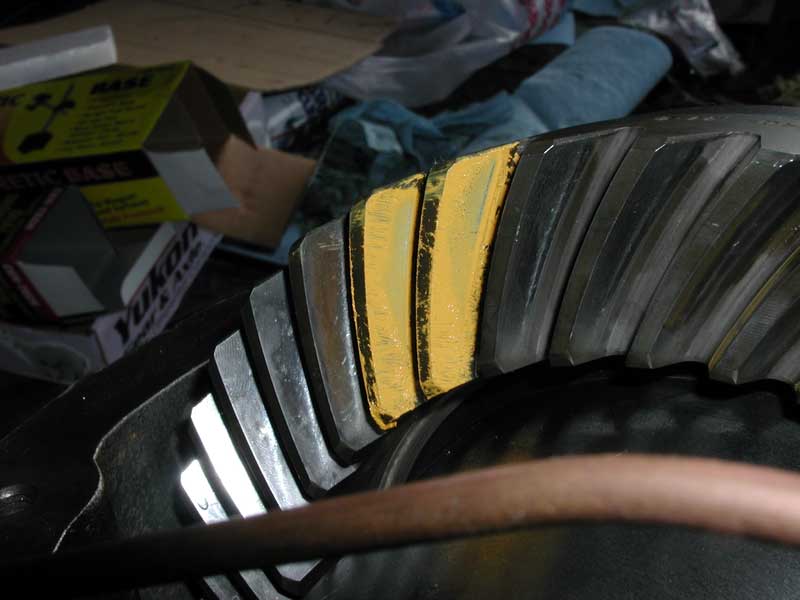 |
This is the coast side of the tooth. This pattern is also very deep and narrow. Notice how it's offset to the heel of the tooth, opposite of the drive side. Without question the pinion is too close. Guess what we get to do now... |
 |
Yep.....tear it all apart again |
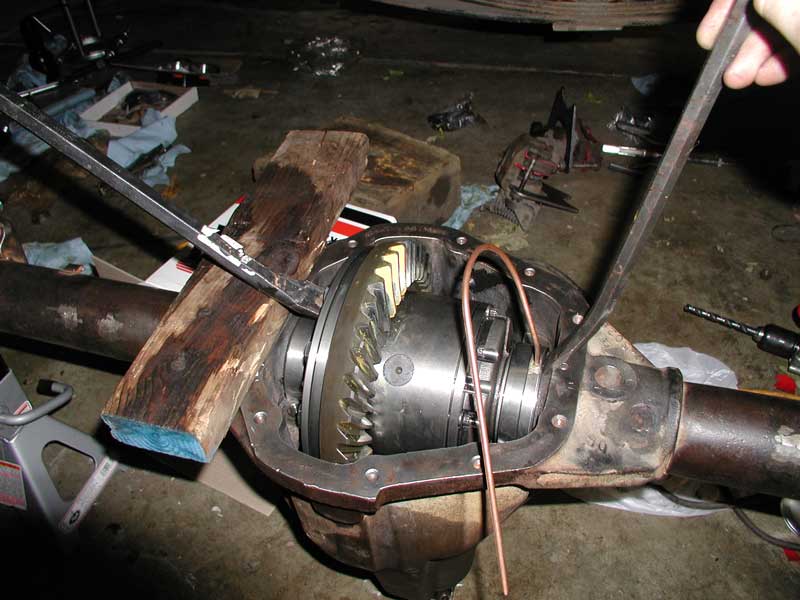 |
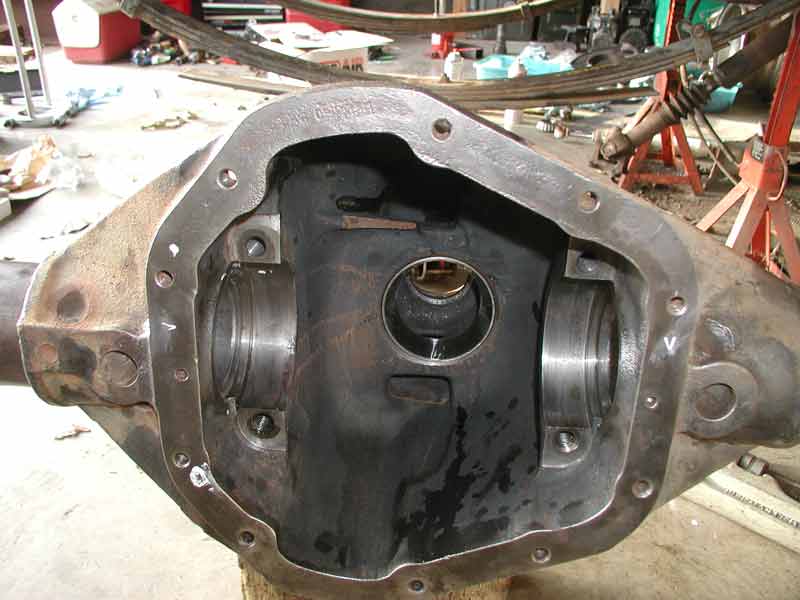
If the carrier bearing preload is tight you'll need to use pry bars to get the case out. Be careful with the airline side. Try not to booger up the master shim. The trick is to make sure you pull the case straight out. If it's the slightest bit crooked, you'll have a hell of a time. |
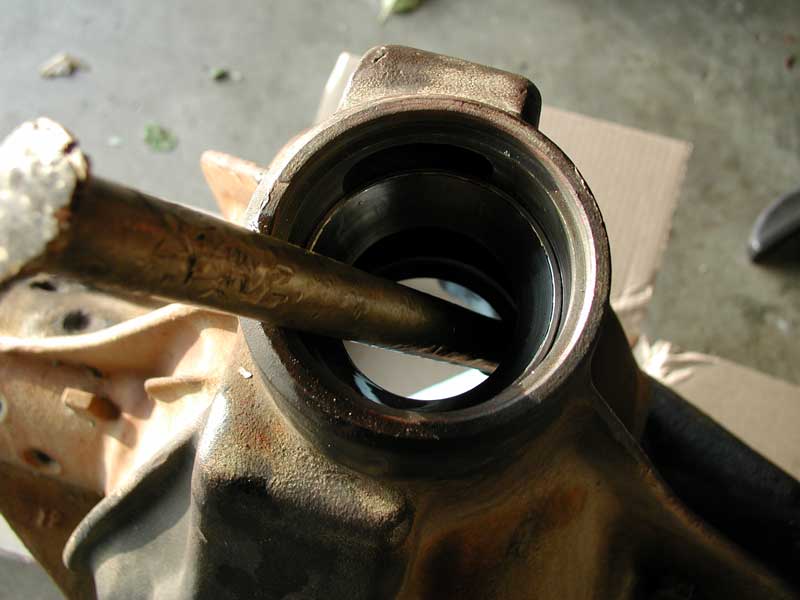 |
Drive the inner pinion bearing race out with a brass drift. Wear safety glasses! Also when your brass drift gets too beat up, cut then end off with a hack saw. Do NOT touch it up on a grinder. The brass can throw the grinder wheel off balance and BOOM! |
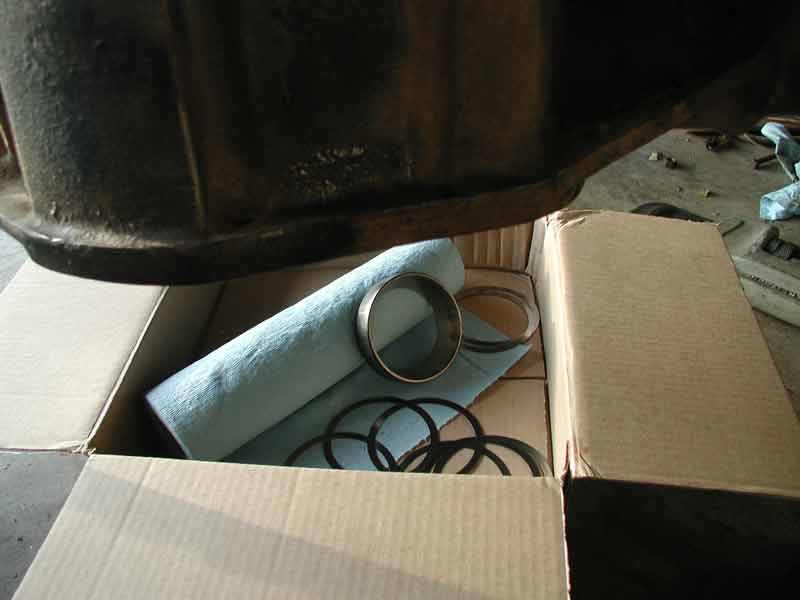 |
Make sure there's a soft place to catch the junk. |
|
|
Adjust the new shim pack. Our pattern indicated that the pinion was too close. To move the pinion further away from the ring gear, we need to decrease the pinion shim pack. I removed .006" to create a .048" shim pack. It's recommended that you measure the shims individually and add them together. |
 |
Reinstall the new shim pack, race and pinion. Remember that adjusting the pinion shim pack will affect the pinion bearing preload. You'll have to compensate by adding or removing preload shims. Remember the first page? Make sure there is no slop! |
 |
Next we need to decrease
backlash. We do this by adding shims to the ring gear side of the carrier.
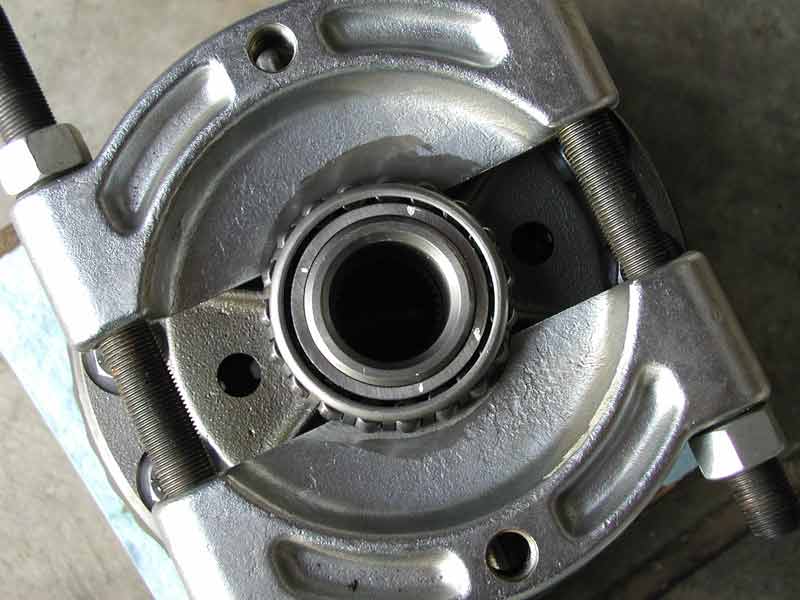
I'm using a bearing splitter to remove bearings. This has always worked very
well for me. You can also use a 2 jaw style puller on some carriers, or you
can buy a high dollar bearing puller specifically for this. The important thing is to NOT pull on the bearing cage. Notice where I have ground on the bearing splitter to create additional clearance. At any time, you should be able to freely move the bearing cage. If not, then stop and re-adjust. |
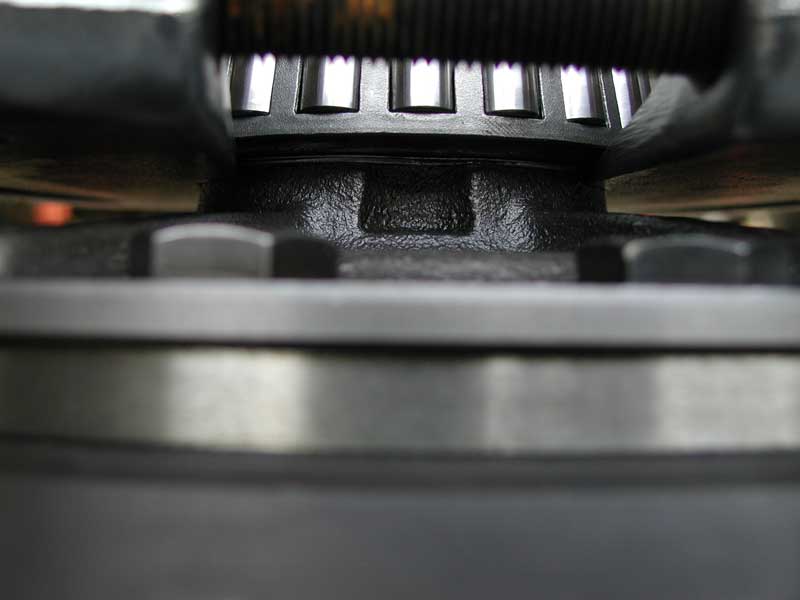 |
Make sure the splitter bites in below the bearing. Don't worry about the shims. They don't don't get ruined very often. You can also use a hammer and tap them flat again. If you have enough, just grab some new ones. Notice the relief in the bearing journal. This is where you would pull with a standard 2 jaw puller. |
 |
Please don't laugh. I don't have the hydraulic ram that came with my puller kit anymore. This is the next best thing. I'll gladly accept a new OTC ram if anyone wants to donate. If you don't have a press, you can use a large 2 jaw puller on the the splitter. |
|
|
Works Great! I've decided to add .010" to the ring gear side for a total of .050". This will shift the carrier toward the pinion and decrease Backlash. |
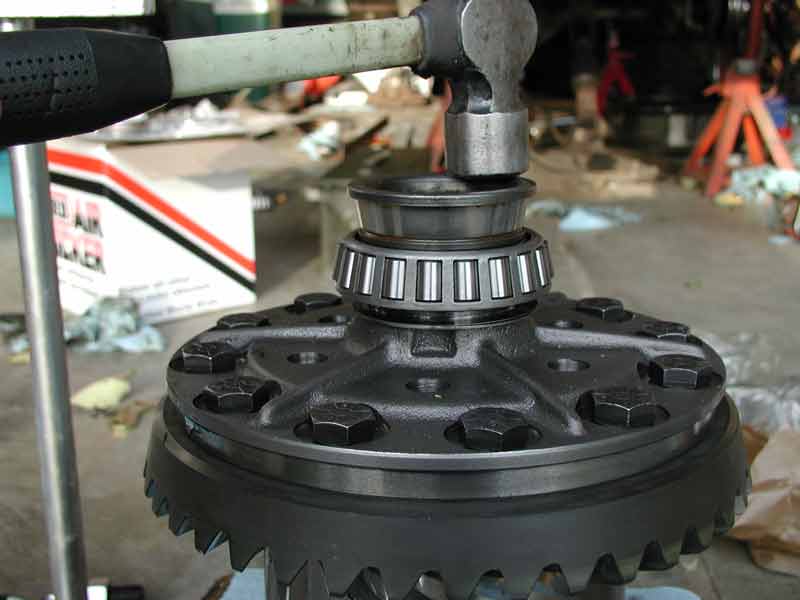 |
My bearing installer. Also works great! |
|
|
If you add shims to the ring gear side, then
you need to remove an equal amount from the other side and vise versa. If the preload is
still too loose, then it may not be necessary to adjust the other side. On
the same note, if the backlash is too tight, but preload is loose, then you
can add shims to the pinion side. This will increase preload and backlash.
Basically you are moving the carrier side to side. I removed .007" for a total of .023" |
 |
Re-install the carrier and bearing caps. Might be a good idea to wipe the old gear marking compound off the pinion and ring gear. Not required though. |
|
[Next] |
|
|
|