|
|
|
| The diagrams below were copied from the www.ring-pinion.com Yukon install manual. | |
 |
|
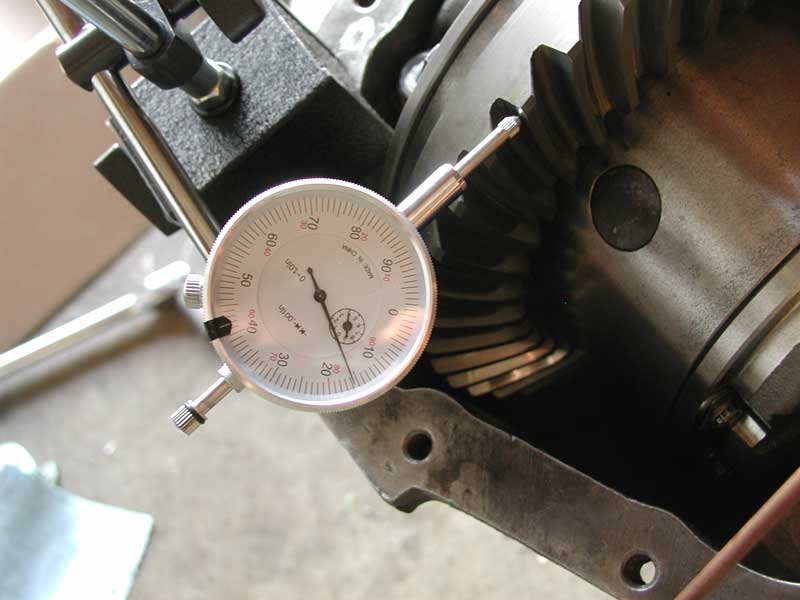 |
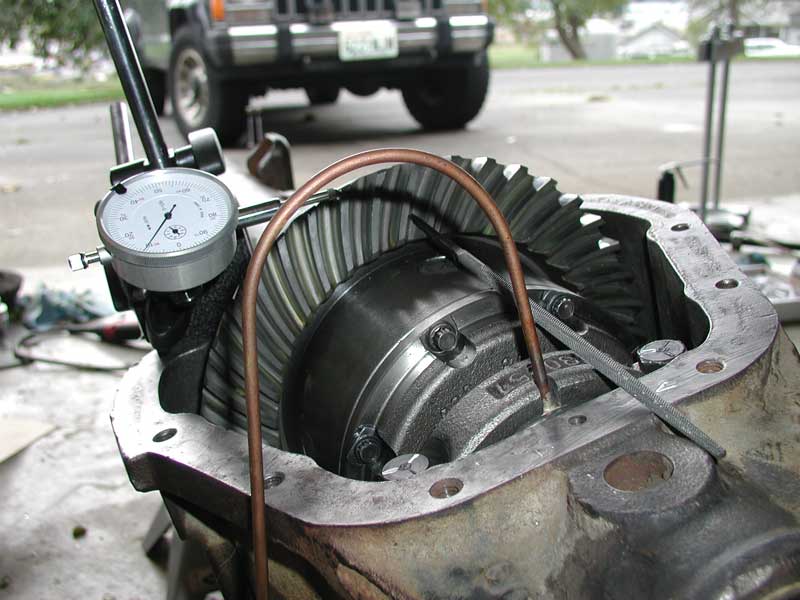
Here we go again........ Check backlash. I'm still a little loose at .015". Remember, when you adjust the pinion depth, you affect backlash. I moved my pinion away, which increased backlash. I didn't compensate enough. I'll have to add another .010" to the ring gear side shim pack. |
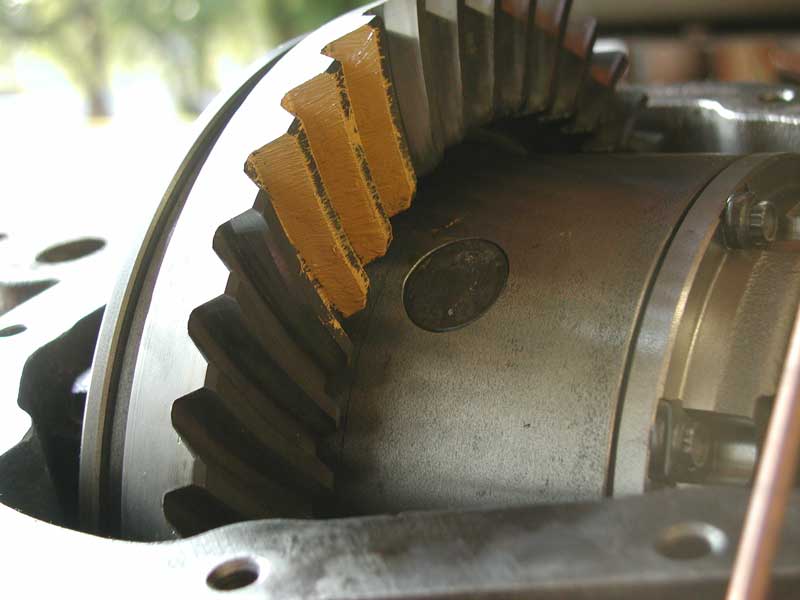 |
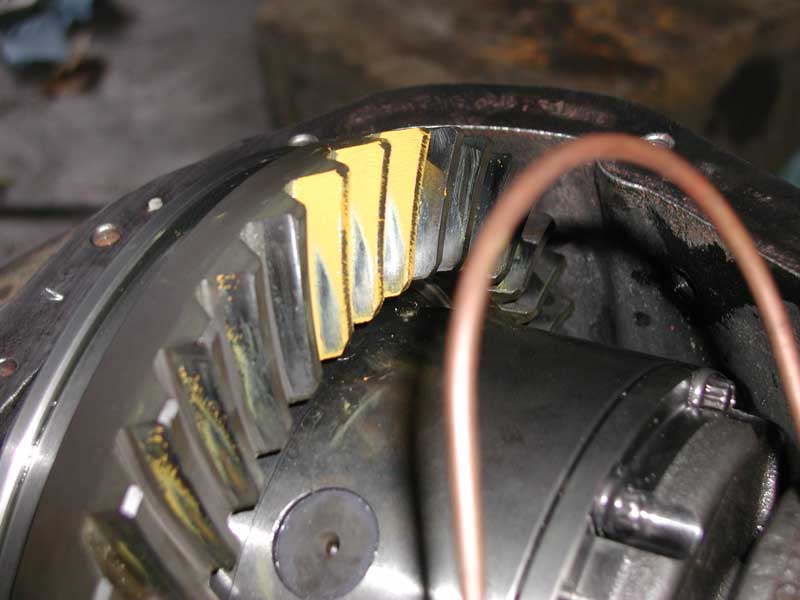
Once again paint a few
teeth. Technically I should get the backlash correct before checking the
pattern, but this is fun, so here goes! It helps to mix a little oil in with the gear marking compound to thin it out a bit. Pinion: .048" |
 |
Ok, that sucked. Nothing really changed. Pinion is still too deep. This is where experience comes into play.....knowing how much of an adjustment to make. I thought I was closer than I was. I'm going to reduce the pinion shim pack to .038" |
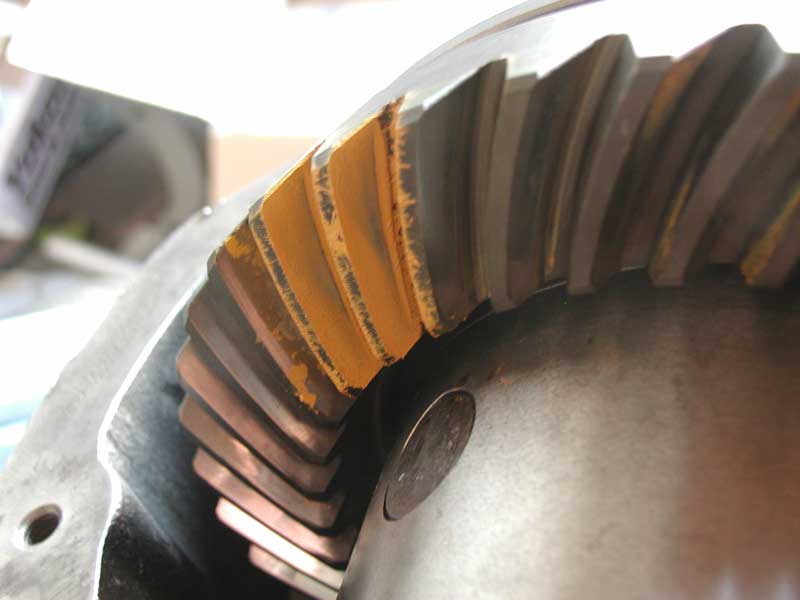 |
And the coast side. There is a little change, but still obviously too deep. |
 |
I expect you have the process
figured out. Removed another .010" from the pinion and added another .010"
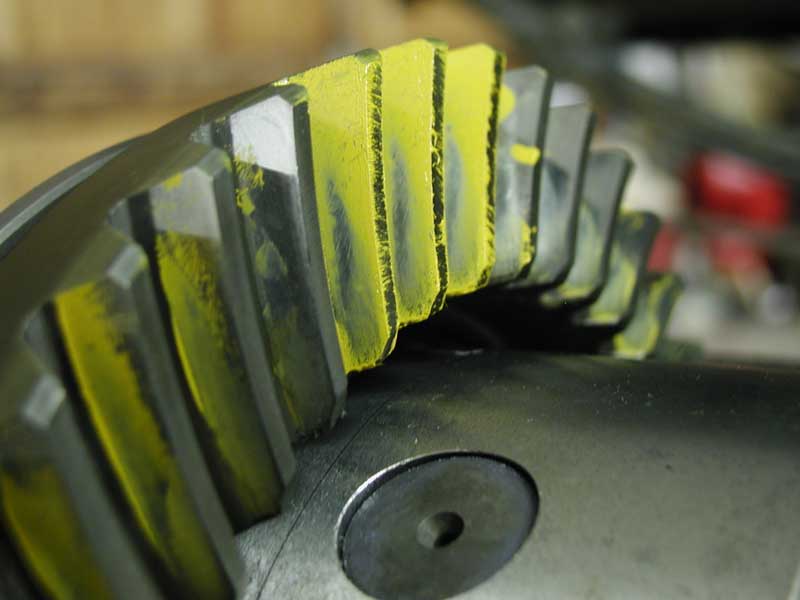
to the carrier ring side to decrease backlash some more. Pinion: 038" Backlash: .010 carrier, ring side: .060" Pinion side: .013" Drive side: Now this is looking better. Notice how the pattern opened up nice and broad and somewhat rounded. Still seems close to the toe of the tooth. I'm going to remove another .005" and see what happens. |
 |
Again much better. The pattern isn't as clear this time, but notice how it opened up and is taking up the whole tooth. This is actually an acceptable pattern. However I'm going to try and get the drive side looking a little better. |
 |
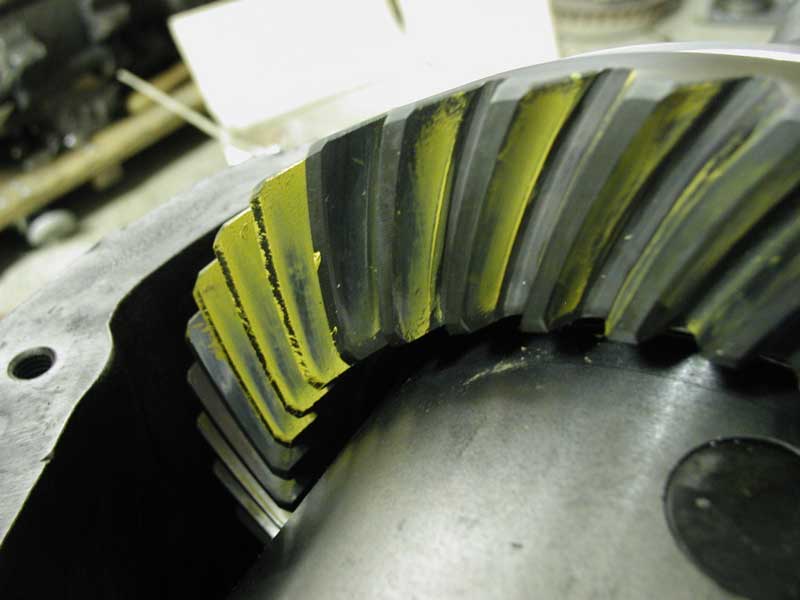
Pinion: 033" Backlash: .010 carrier, ring side: .060" Pinion side: .013" This looks pretty good. It pulled the pattern off the toe of the tooth like I wanted. However, notice how it got a little narrower......lets have a look at the other side. |
 |
Not bad, but not as nice as it was. Notice how the pattern moved to the face of the tooth (top) and toward the toe a bit. Again, I think this is an acceptable pattern, but not good enough for me. I'm going to add .003" back to the pinion, decrease backlash a tad and call it good. |
 |
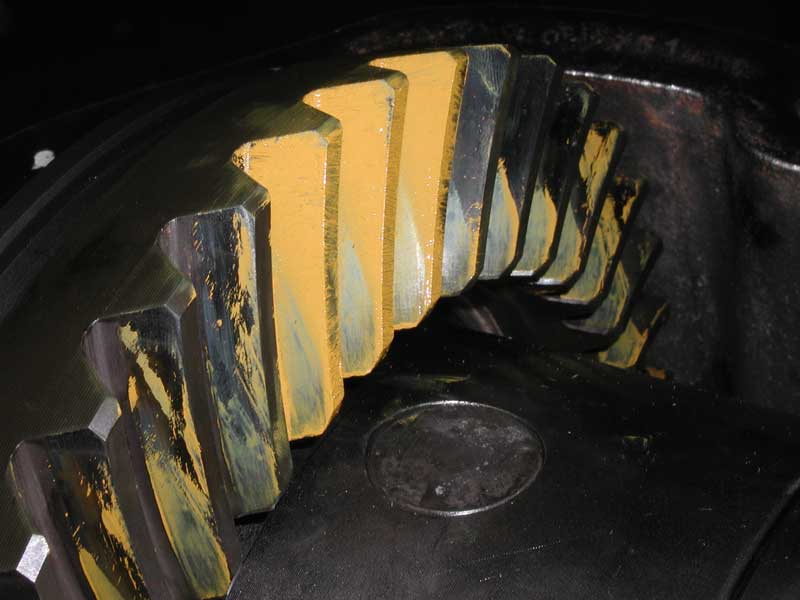
Whoops! I could lie and say I
did this for the sake of this write up, but no......I'm an idiot and didn't
put the pinion shim pack in. I decided to continue to show the what it might
look like if the pinion is to far away. Notice the extreme change. The drive side pattern moved completely to the heel and top of the tooth. |
 |
Again an extreme change from the other patterns. Barely any contact at all!! |
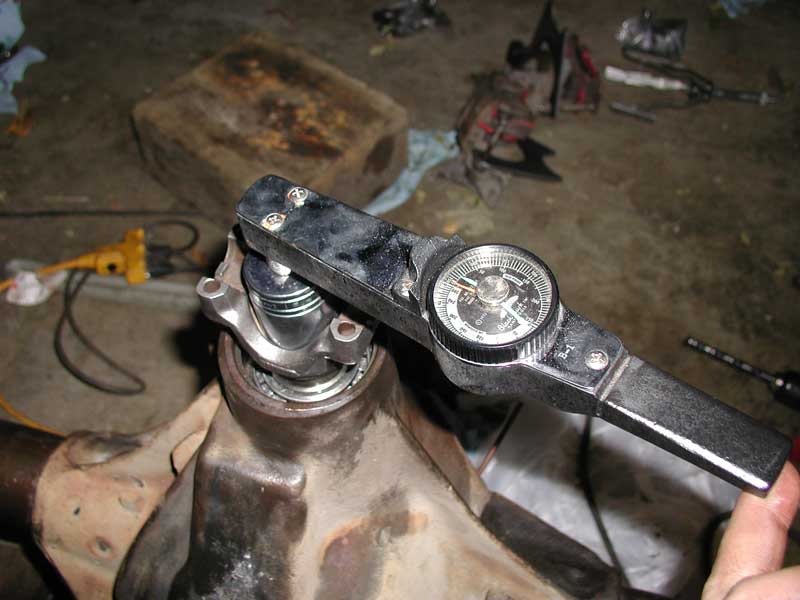 |
Since I'm getting close to a final pattern, I dialed in the pinion bearing preload by adjusting the preload shims. Remember the first page? A dana 60 with new bearings calls for 17-30 in/lbs. That's quite a bit! The pinion will have quite a bit of drag on it. Note that this is the amount of force to keep the pinion turning, NOT the amount to get it started turning. |
 |
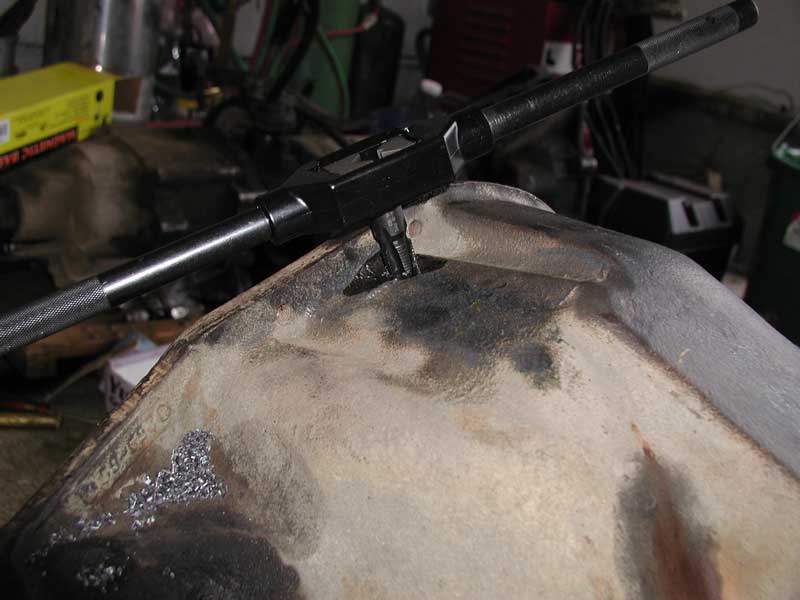
I decided to notch the bearing
cap so I could use it for the next pattern. I was a little concerned about
drilling/notching the bearing cap. The bearing caps are machined with the
housing, and if you ruin it, the whole housing is pretty much junk. I read quite a few opinions on whether to drill or notch, and the overwhelming response was to save yourself some grief and make a notch. Unless you drilled absolutely dead on, you run the risk of snapping the copper air line off when torqueing the bearing cap. There was talk of a secret tool out just for this purpose, but no one said what it was. I have a hunch it was a super secret 1/4" round file. That's what I used. Worked great! The bearing caps are soft, and easy to file by hand. Only took me a few minutes. I did attempt to drill first just to see how hard it would be. I don't have a drill press. Guess what..... my pilot hole was a tad crooked. Don't forget to chamfer the hole on the top and bottom. |
 |
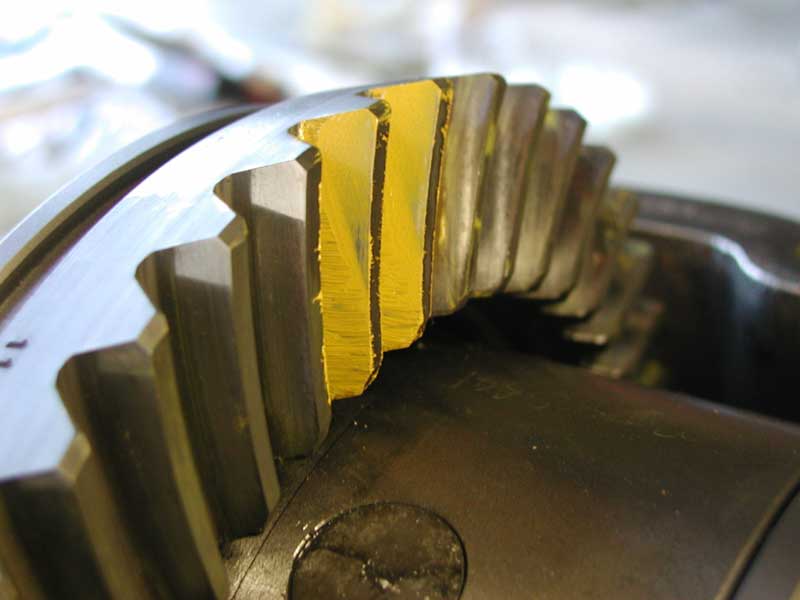
Pinion: 036" Backlash: .08 carrier, ring side: .066" Pinion side: .016" This looks pretty good. It's not as picture perfect as I would like, but I think it will do just fine. Nice big rounded pattern centered on the face and flank of the tooth (top and bottom) Keep in mind these gears were made in 1961!! They have a few miles on them and I think the pattern reflects that. I still think they will last forever in my bronco. Notice I also decreased the backlash a tad and increased
the preload by adding another shim to the pinion side of the carrier. There
still isn't enough preload, so I'll be adding more shims to the pinion side
on final assembly. That will have to wait until I get the housing back from
welding on the 9" ends. |
 |
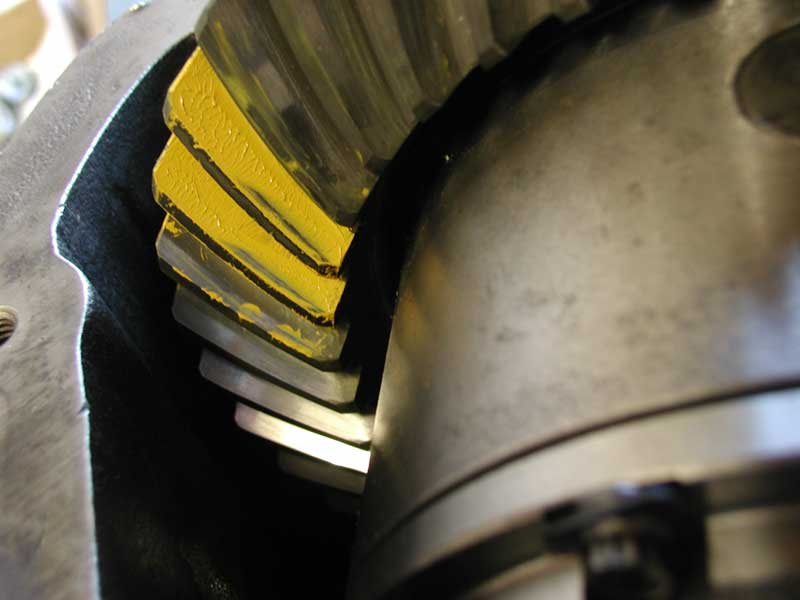
Again, I'm happy with this. Nice
big rounded pattern that covers a lot of the tooth. I'm calling it good. Take note that I found the original pinion shim pack after I had finished setting up the gears. As mentioned on the Setting Pinion Depth page. I determined a good starting shim pack would have been none other than .036". Imagine that!!! |
 |
The ARB requires that you drill a hole in the housing for the air line. No big deal. Make sure to clean up all the metal shavings. The hole is 7/16" and tapped with a 1/4" pipe thread tap. Don't go too deep with the tap. |
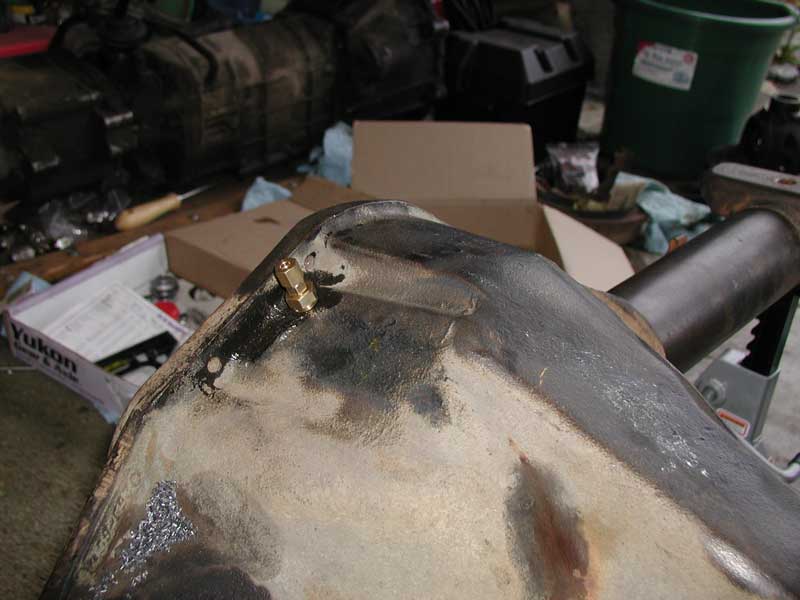 |
No problem. So far installing an ARB hasn't been very difficult. In fact I think it's easier because you don't have to pull one of the carrier bearings to adjust shims. |
| Well this where I'll have to stop until I get 9" ends welded on. See you soon! | |
|
|