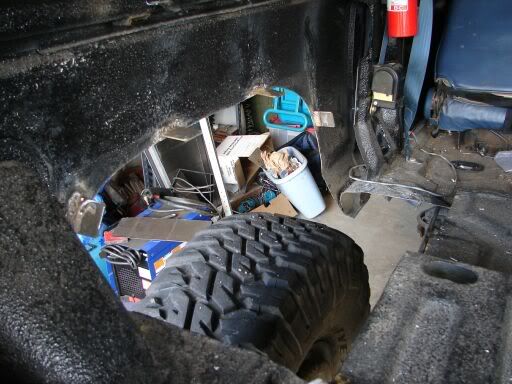
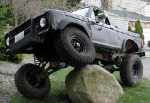
Anybody install wheel tubs in B2? Pictures or tips?
Your right. I was trying to shorten it up by taking a few inches off from the base of the semi-circle, but that also shortens the length, and I can’t keep doing that. It’s a lot taller than it needs to be now. I have to decide whether I want to try and bend a single piece (the sheet metal is rolled {EDIT, Proper term is BEADED}– I think that’s the term for the valleys bent into it to provide stiffness – so I am not sure it will look) or just cut. I probably will end up cutting 3 separate flat panels and join them with angled strips of aluminum/riveting.
Last edited by bailey on Tue Feb 21, 2006 4:27 pm, edited 1 time in total.
1988 B2
d44/9"
tired 2.9L
d44/9"
tired 2.9L
So after a ~2 month hiatus I figured I better get going on these or I’d never get to wheel this spring. I am nearly done as of this weekend, and if I were to do them again it would take about 1/5th the time and they’d come out a lot better. Nonetheless, I’ve learned a lot about sheet metal. The jigsaw is great for sheet metal, and welding the thin stuff is tricky.
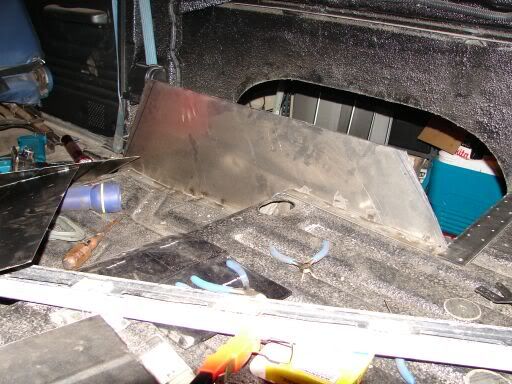
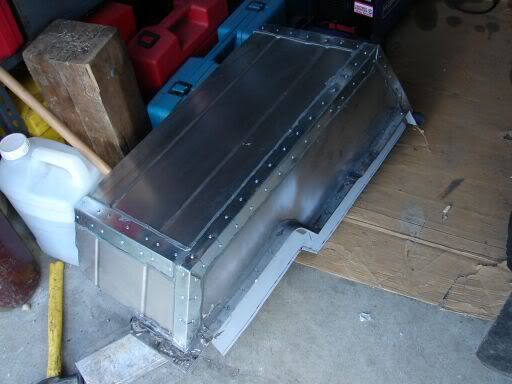
Anyway, after I cut out the support piece (above) and riveted it to the tabs on the metal frame, I cut several long 2” wide pieces of extra 26 gauge. I bent them 90 degrees lengthwise down the middle to make “angle”, then I pug welded the angle to the top, front and back of the tub. This little flange was really helpful in mocking things up and initial assembly:
Anyway, after I cut out the support piece (above) and riveted it to the tabs on the metal frame, I cut several long 2” wide pieces of extra 26 gauge. I bent them 90 degrees lengthwise down the middle to make “angle”, then I pug welded the angle to the top, front and back of the tub. This little flange was really helpful in mocking things up and initial assembly:
1988 B2
d44/9"
tired 2.9L
d44/9"
tired 2.9L
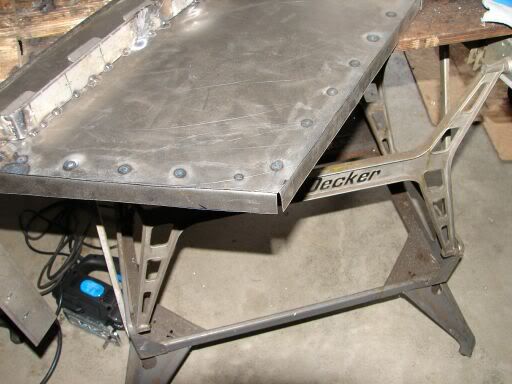
Once the pieces were cut, I tacked them together, marked the excess that needed to come off on the straight side (i.e. that stuck out past the support piece), and cut that off. Then I began the long task of welding the seams together. Basically, you have to use a series of tack-welds and even then I occasionally had burn-through and had to carefully refill with weld. I am very novice on the welding side of things, and the bead needed cleaning up with the grinder:
1988 B2
d44/9"
tired 2.9L
d44/9"
tired 2.9L

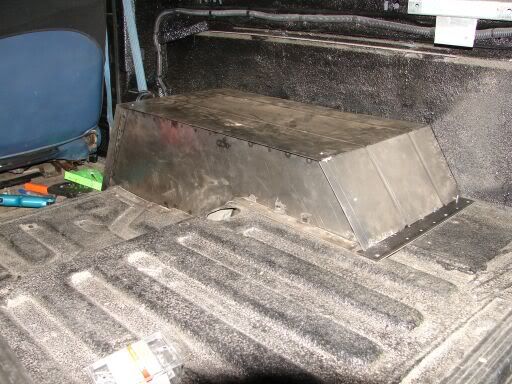
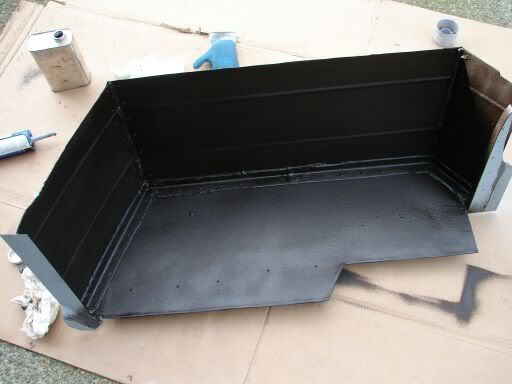
To fasten the tubs to the outer body panel, I made some tabs out of thin strip steel and welded them on perpendicular to the panel. As one might expect, this blistered the paint on the outside. My truck is a trail rig with lots of scrapes and dings and will be getting a rattle can job here shortly. I drilled a hole in each one of these tabs to mount the tub to, then fastened with rivets:
1988 B2
d44/9"
tired 2.9L
d44/9"
tired 2.9L
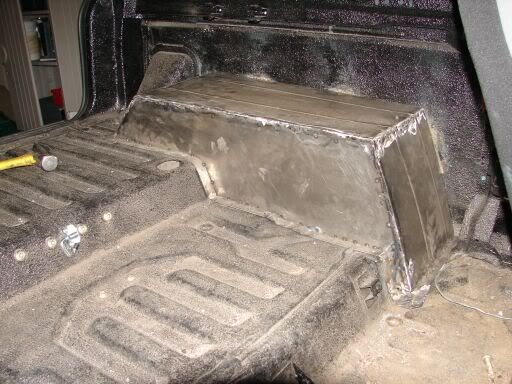
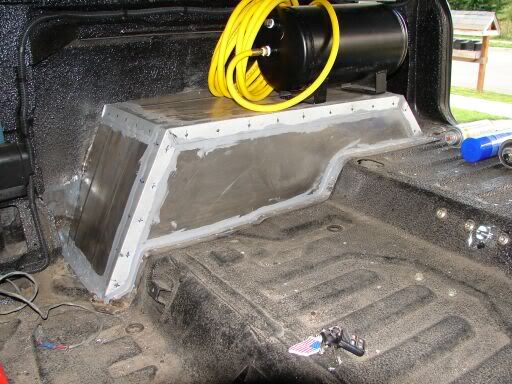
Here’s one in place. The tub frame is riveted to the floor every two inches or so. My orignal plan was to weld the assembly in, but I figured this way will be easier to modify. I need to run a bead of seam sealer around the edges where the tub meets the body and where the frame meets the floor. When I get enough extra money to buy some Herculiner, I’ll clean up the sealer on the cab-side of the tubs and slather them with bedliner.
1988 B2
d44/9"
tired 2.9L
d44/9"
tired 2.9L
All in all, this project was a little more than I was bargaining for given my limited expertise. On the positive side, the floor stiffened up nicely after I got the tubs riveted in, and despite the thin gauge metal the assembled tubs are very rigid. If I were to start over, I’d still just buy a big sheet of 18 gauge, though. I think it would be easier to weld, if anything.
I plan on taking the truck out sometime to make sure that the tubs and hacked floor are up to the rigor of off-road flexing before I do the final sealing and herculining.
I plan on taking the truck out sometime to make sure that the tubs and hacked floor are up to the rigor of off-road flexing before I do the final sealing and herculining.
1988 B2
d44/9"
tired 2.9L
d44/9"
tired 2.9L
-
no v8? why drive?
- Posts: 87
- Joined: Tue Feb 22, 2005 2:41 pm
- Location: southeastern WA
- Contact:
Thanks guys. Alas I just discovered is that my spare tire will no longer fit lying flat in the bed anymore because of the tubs. I need to fab up some sort of bed carrier to lift up the front part of the tire to clear them. I was hoping I was through. Shouldn't be too hard, though.
1988 B2
d44/9"
tired 2.9L
d44/9"
tired 2.9L
-
AlbertaBoy
- Posts: 29
- Joined: Fri Apr 30, 2004 12:20 am
- Location: Wetaskiwin, Alberta, Canada