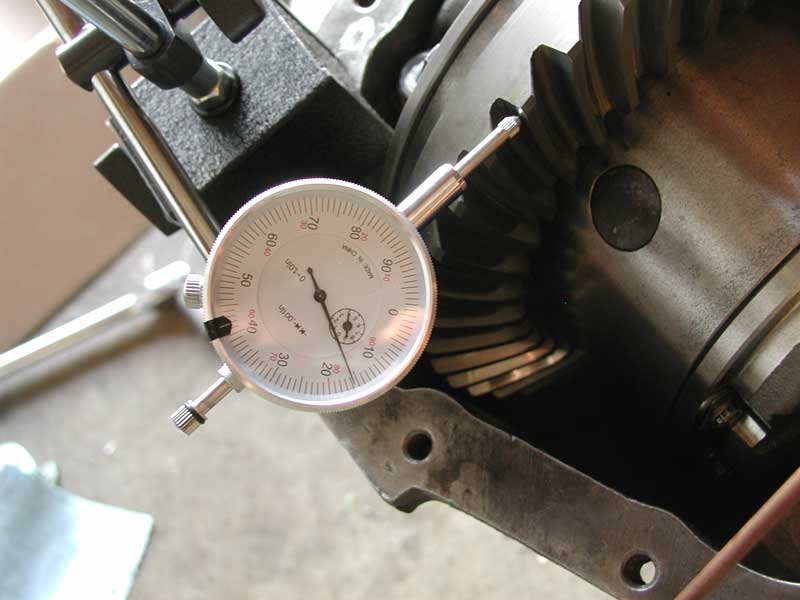
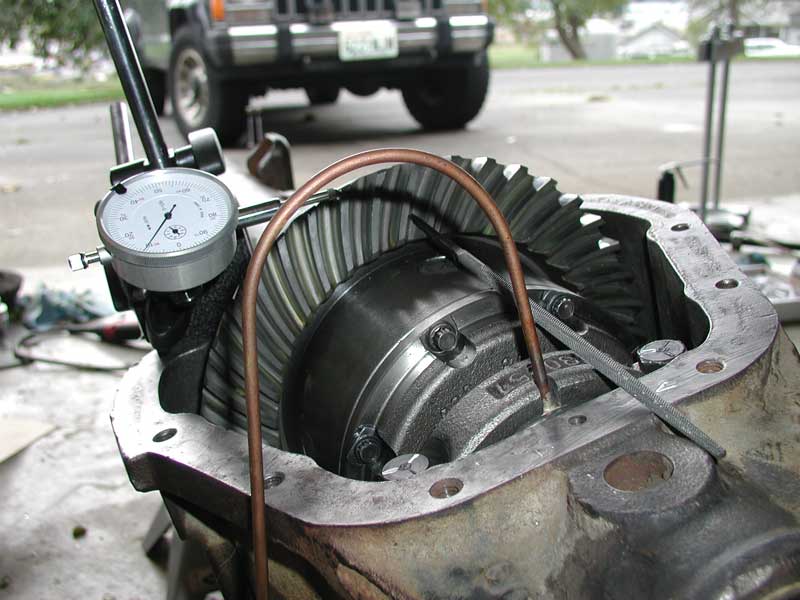
Check backlash. I'm still a little loose at .015". Remember, when you adjust the pinion depth, you affect backlash. I moved my pinion away, which increased backlash. I didn't compensate enough. I'll have to add another .010" to the ring gear side shim pack.
It helps to mix a little oil in with the gear marking compound to thin it out a bit.
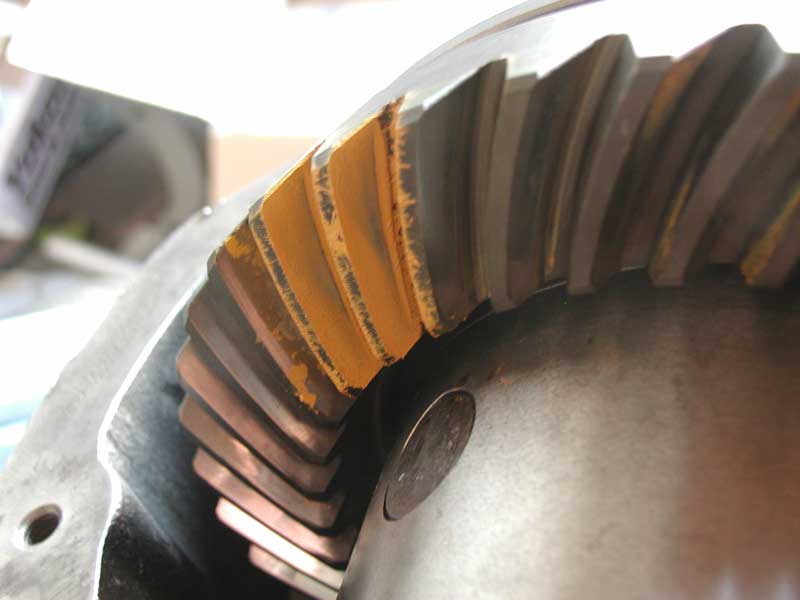
Pinion: .048"
Backlash ~.015"
Carrier, ring side: .050"
Pinion side: .023"

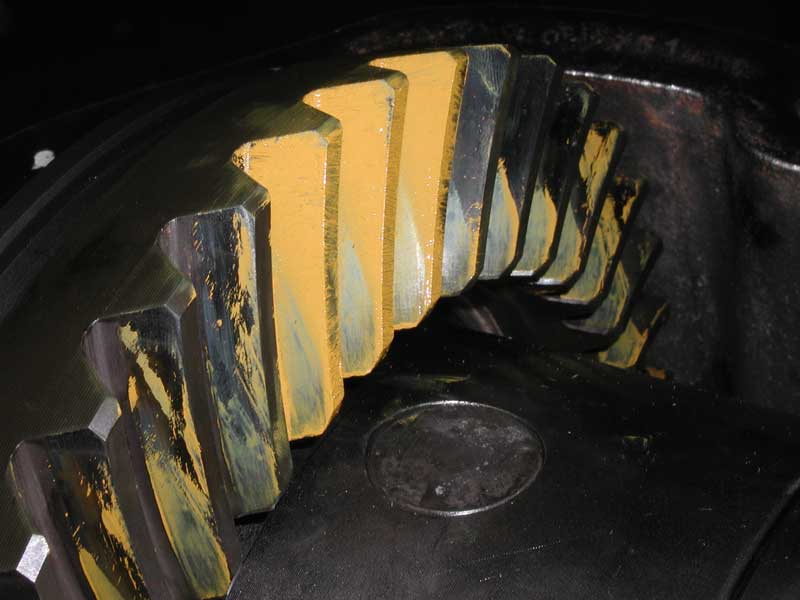
Pinion: 038"
Backlash: .010
carrier, ring side: .060"
Pinion side: .013"
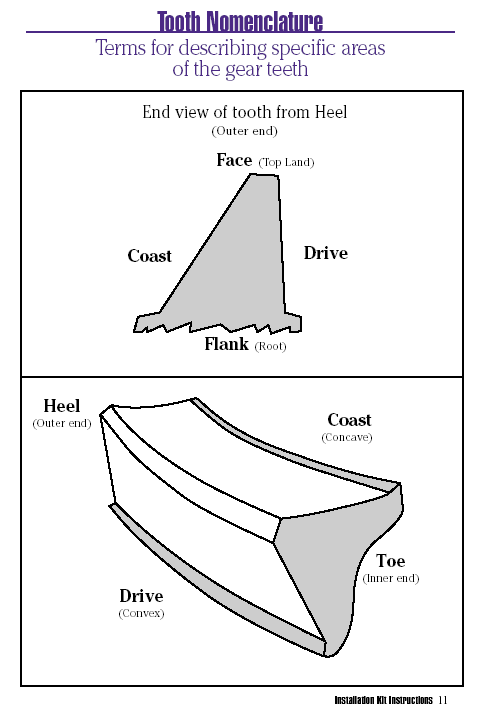
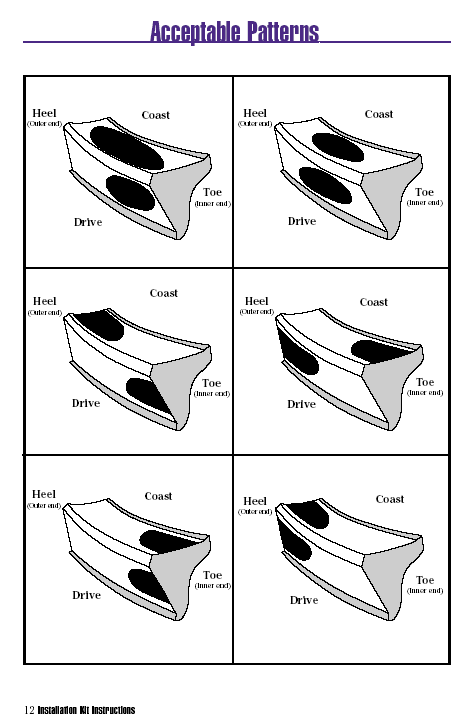
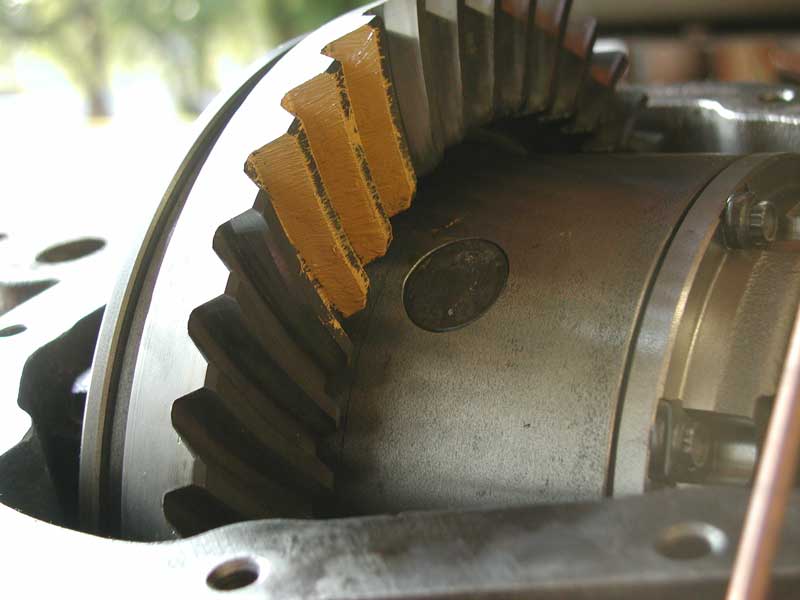
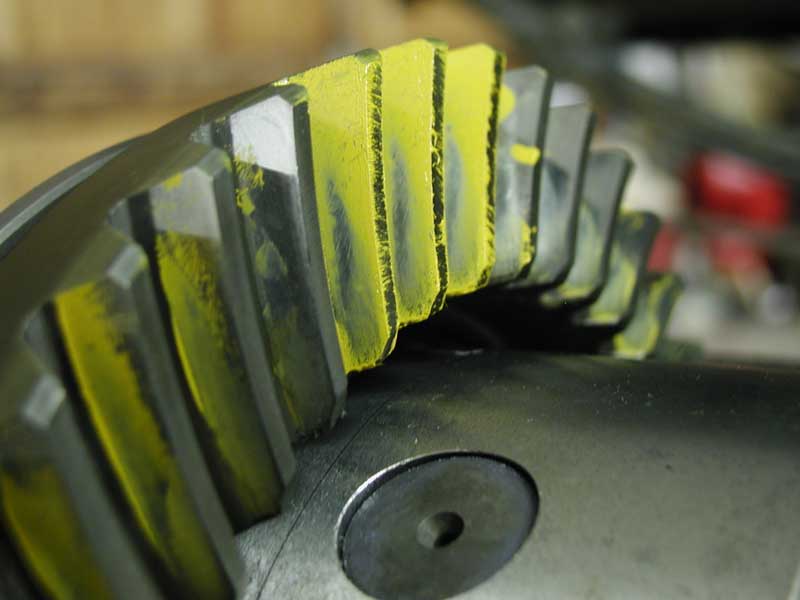
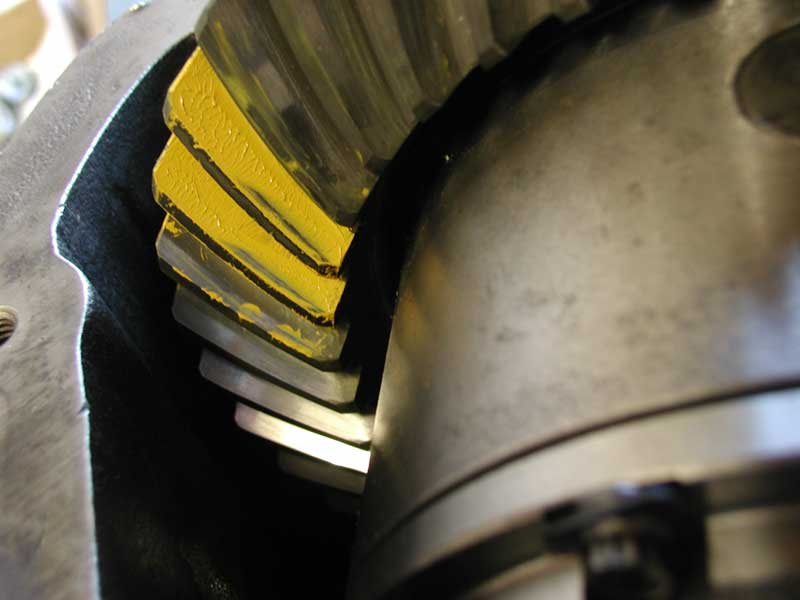
Drive side: Now this is looking better. Notice how the pattern opened up nice and broad and somewhat rounded. Still seems close to the toe of the tooth. I'm going to remove another .005" and see what happens.

Backlash: .010
carrier, ring side: .060"
Pinion side: .013"
This looks pretty good. It pulled the pattern off the toe of the tooth like I wanted. However, notice how it got a little narrower......lets have a look at the other side.
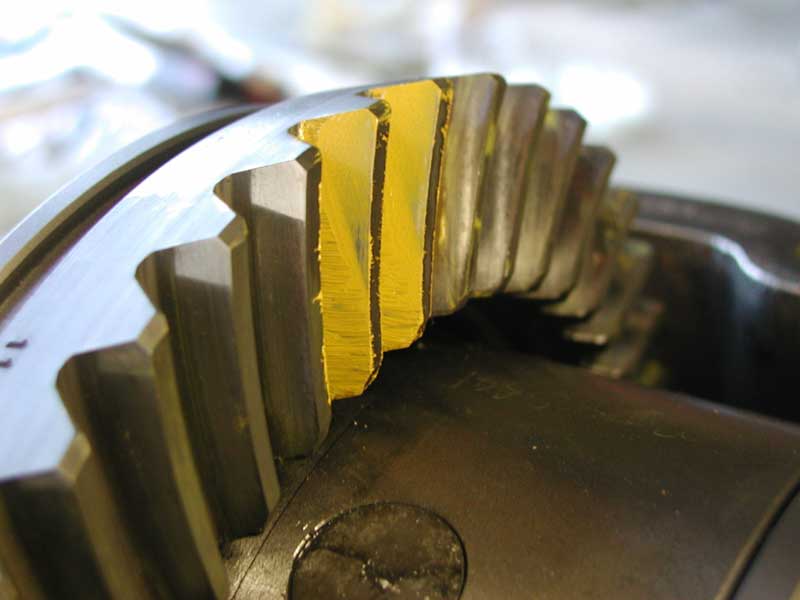
Notice the extreme change. The drive side pattern moved completely to the heel and top of the tooth.
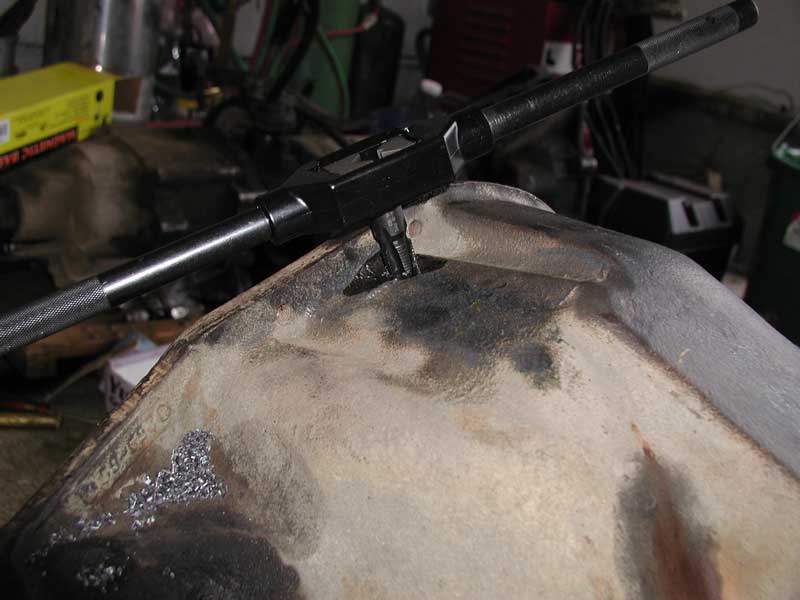
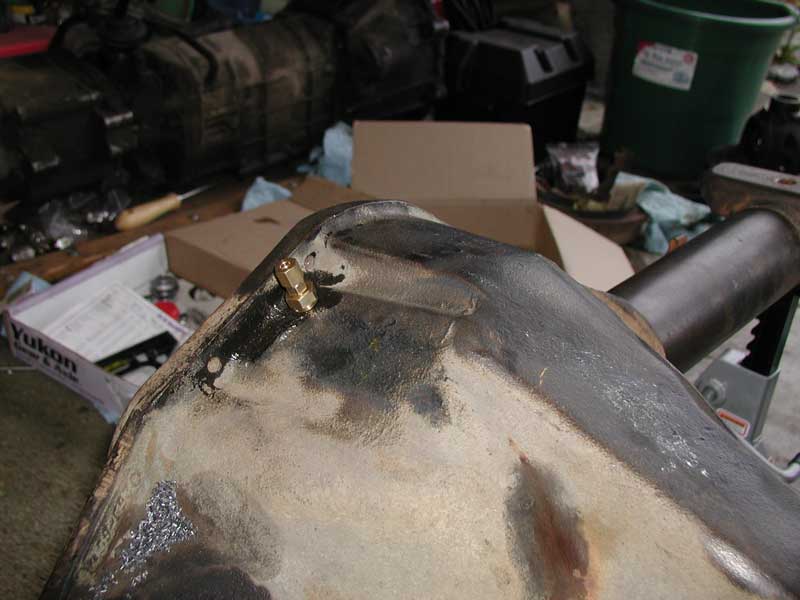
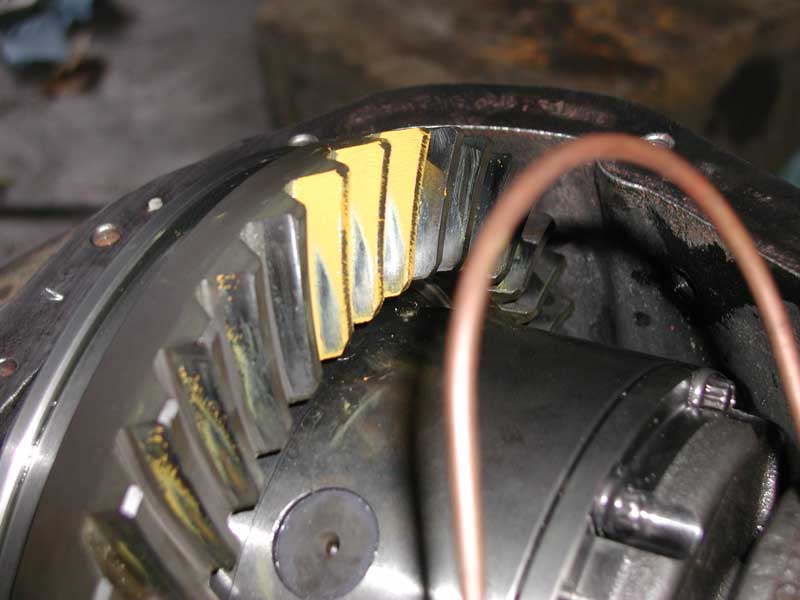
I read quite a few opinions on whether to drill or notch, and the overwhelming response was to save yourself some grief and make a notch. Unless you drilled absolutely dead on, you run the risk of snapping the copper air line off when torqueing the bearing cap. There was talk of a secret tool out just for this purpose, but no one said what it was. I have a hunch it was a super secret 1/4" round file. That's what I used. Worked great! The bearing caps are soft, and easy to file by hand. Only took me a few minutes. I did attempt to drill first just to see how hard it would be. I don't have a drill press. Guess what..... my pilot hole was a tad crooked. Don't forget to chamfer the hole on the top and bottom.
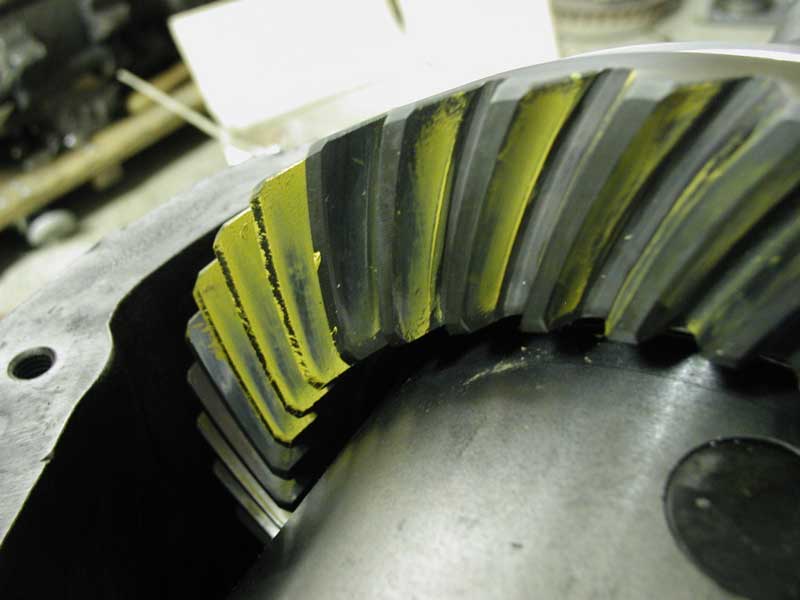
Backlash: .08
carrier, ring side: .066"
Pinion side: .016"
This looks pretty good. It's not as picture perfect as I would like, but I think it will do just fine. Nice big rounded pattern centered on the face and flank of the tooth (top and bottom)
Keep in mind these gears were made in 1961!! They have a few miles on them and I think the pattern reflects that. I still think they will last forever in my bronco.
Notice I also decreased the backlash a tad and increased
the preload by adding another shim to the pinion side of the carrier. There
still isn't enough preload, so I'll be adding more shims to the pinion side
on final assembly. That will have to wait until I get the housing back from
welding on the 9" ends.
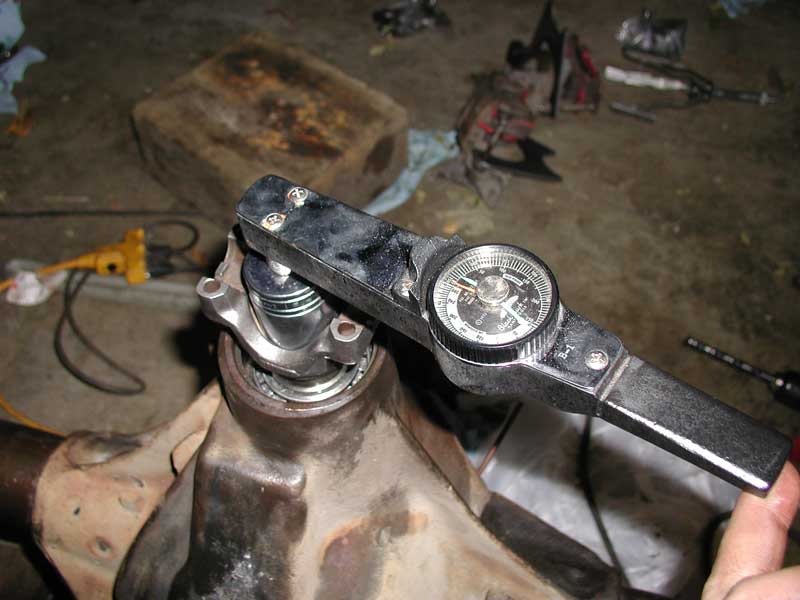
There isn't really a way to measure carrier bearing preload. The proper
method is to use a case spreader and open up the housing a tad to allow
additional shims to be added. Then once you remove the spreader, the housing
compresses on the bearings providing the bearing preload. The service manual
recommends an addition .010" for carrier bearing preload.
All I can say is you want it to be a tight fit. You shouldn't be able to
push the carrier in by hand, and you should need a pry bar to remove it. I
think it would be difficult to get too much preload without the use of a
case spreader. Keep in mind that adding additional shims for preload may
affect backlash.

Take note that I found the original pinion shim pack after I had finished setting up the gears. As mentioned on the More on Setting Pinion Depth page. I determined a good starting shim pack would have been none other than .036". Imagine that!!!