Bronco II 2wd to 4wd transfer case conversion
Published on February 26, 2003
Installing or converting to a manual shift transfer case is not a big job. It is a lot easier than anyone would expect, and can be done with a few common tools.
I recently installed one in my 89 Bronco II. It rolled off the assembly line as a 2wd, and stayed that way till I got it. It came with a BW13-59 'Dummy' t-case. This write-up explains how I did it. It can be done in any Bronco II or Ranger 2 or 4wd. The 2wd Ranger requires a new 4wd transmission unlike a Bronco II.
I began by securing to components needed to do the conversion. These are:
1) The transfer case. I went with the BW 13-50 manual shift, which came stock in all Bronco II's. Electric versions were also available, but most replace them with the manual type.
2) The t-case shifter linkage and bolts. Be sure you get the correct linkage for they type transmission you plan to use. The bolts are also a MUST HAVE!
3) The shifter boot and floor plates. The boot is of course rubber, and the floor plates consist of 2 different ones. One is plastic and holds down the boots, the other is a metal one that bolts under the carpet the plastic one screws onto the metal one. Again, make sure you get the right ones for the type transmission you plan to use.
4) The t-case-to-transmission gasket, and the shifter linkage bushing. You may get lucky and get a good bushing with the case, but you will have to buy a new gasket. I could not find anyone who carried it except the local Ford Dealer. It cost me about $5.
5) And finally yet importantly, the t-case wiring harness and vent hose. The harness is only two wires, and the case will work perfect without it, but you'll need it to make your dash lights work. The hose however, is mandatory! If your case doesn'tcome with it, your local hardware store will have some rubber hose that will work just as good.
This conversion can be done without having to remove the transmission. And requires no cutting except for a small piece on the carpet.
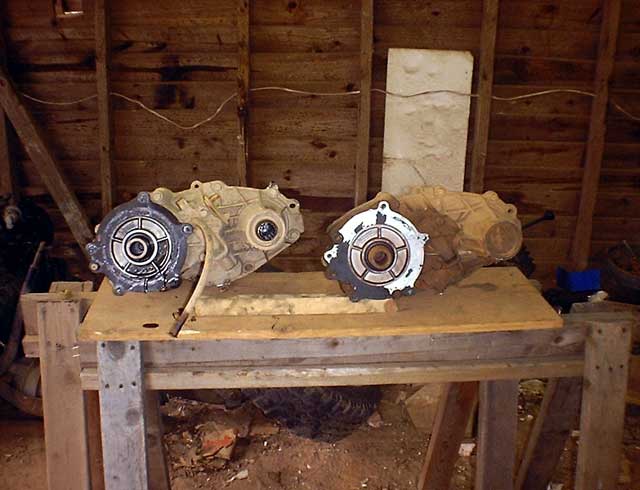
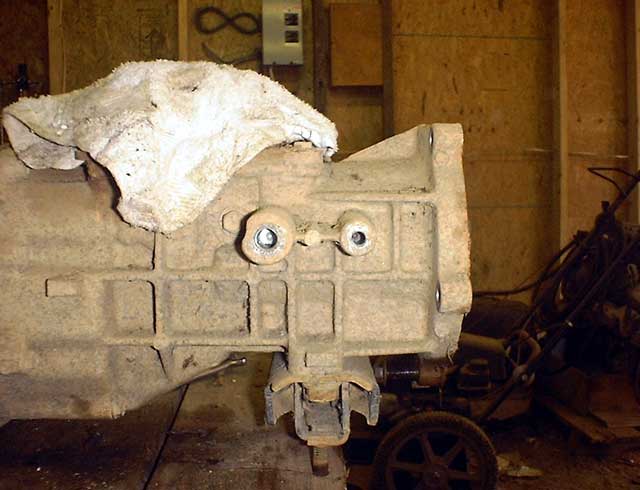
I began by 1st removing the 13-59 'dummy' case which is commonly found on 2wd Bronco II's from '87 to 90 This case is very light because it has no fluid or 'guts'. As you can see, there are not a lot of external differences between the 'dummy' case on the right, and the BW13-50 on the left.
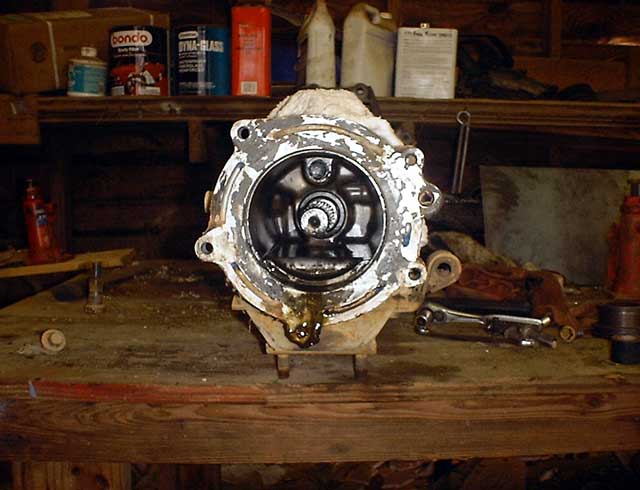
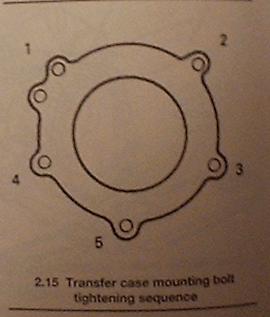
The next step is to bolt the 13-50 onto your transmission where the 'dummy' case was. This is a direct bolt up. Be sure to clean all the old gasket material off both mating surfaces before you bolt them together.
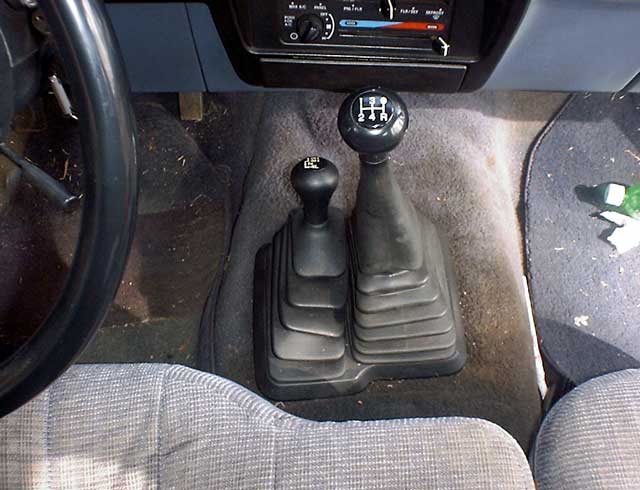
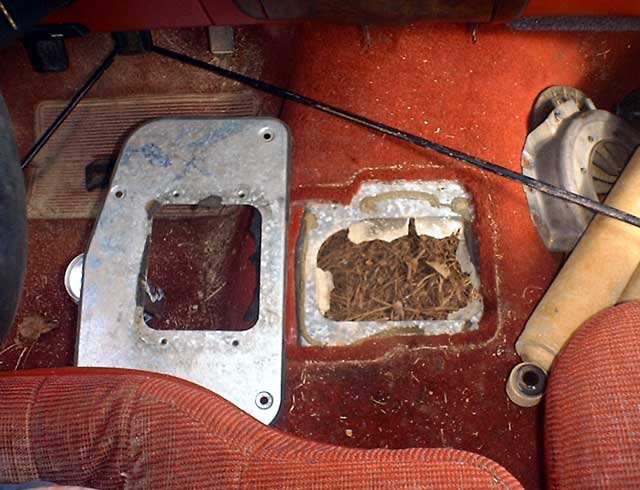
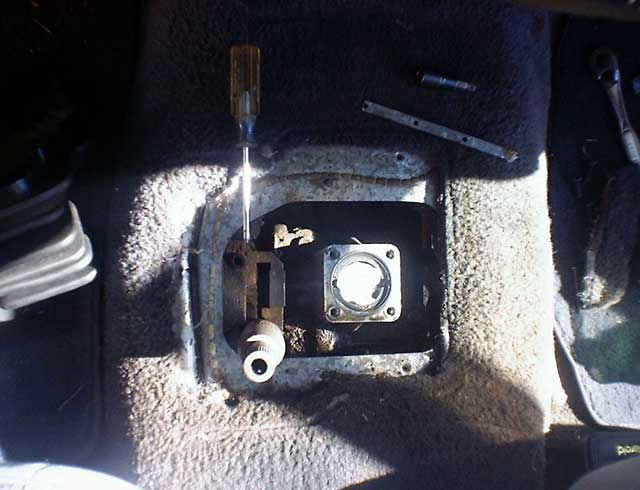
The next step in this process is to remove the transmission shifter and floor plates. Gently pull the carpet back removing anything that needs to be removed in order for you to gain access to the metal plate under the carpet. Replace it, and then put the carpet and anything you removed back. On the left is the old plate I removed from my Bronco II. On the right is what it will look like after it has been replaced. The carpet will not be trimmed out yet, we'll get to that later, so DON'T CUT ANYTHING YET! This picture is of one that is already a 4wd!
We now install the t-case shifter and linkage. Find these two holes on your transmission. They will be on the driver's side towards the rear.
Put the bolts into the linkage and tighten them only finger tight. The shifter bushing is missing in this picture. It goes on the end of the linkage, and slips over the stud on the t-case shifter.
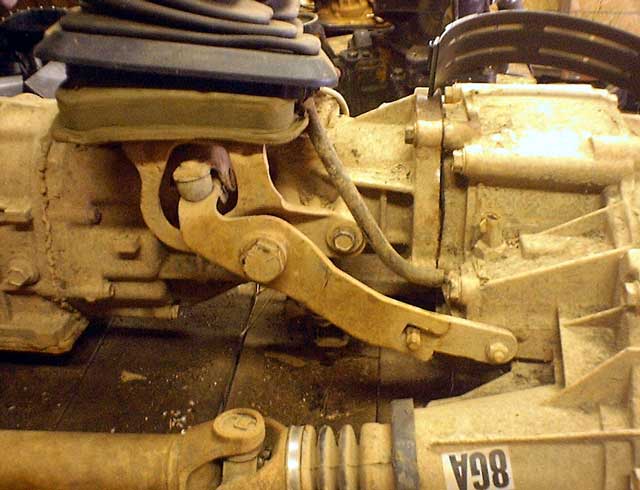
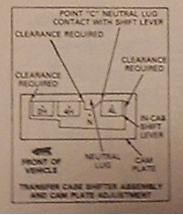
Next comes the adjustment. To do this, put the t-case into the low range position. Then move the cam plate rearward until the low range pawl just contacts the lever.
 >
>
Hold the cam plate into position, and tighten the large bolt 1st, then the smaller one. Check for engagement. There should be a little bit of clearance between the cam and the shifter in 2H and 4H positions.
Next, install the vent hose. The cam plate has a notch for this, and it just slips right in. In this picture, a screwdriver is pointing it out. Try to have about 2" sticking up past the cam plate.
Now carefully trim just enough carpet to let the t-case shifter work. I trimmed just to the side of the 'new' floor plate to be sure. It's better to trim too little than too much. To get the correct amount, we will trim again in a little bit.
Next, install the transmission shifter. Now the 'new' plastic floor plate. This is a one-piece thing, not 2 separate ones. The one on the left is the 'new' one, the right is old. Small metal strips hold the rubber boots in. You can either remove the ones from the old plate, or just glue the boots to the new plate.
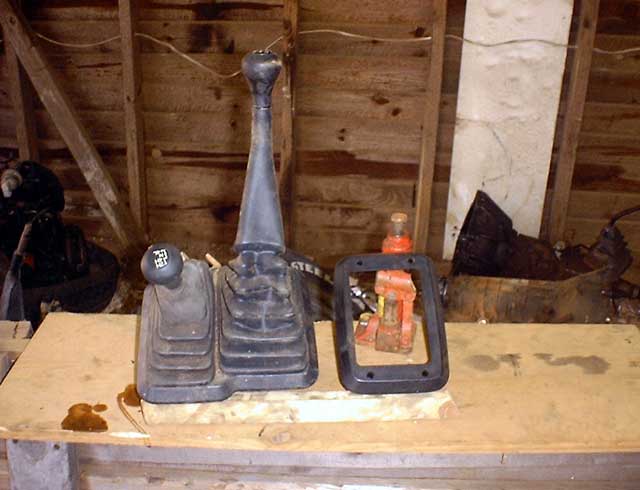
With the boots and plates installed, reinstall the shifter balls. Line them up correctly (Unlike in the picture)!
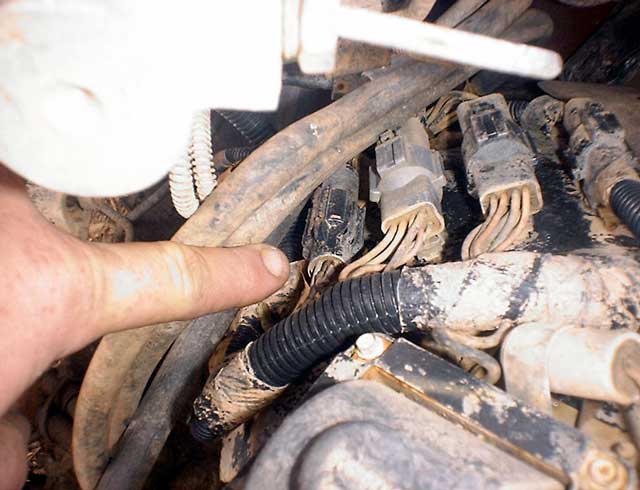
Now we move to under the hood to make our t-case lights work. This plug is included in all Bronco II wiring harnesses whether it is 2 or 4wd. You will find it on the drivers side fender well just below the brake master cylinder. There are 4 plugs total, you want the one nearest the engine.
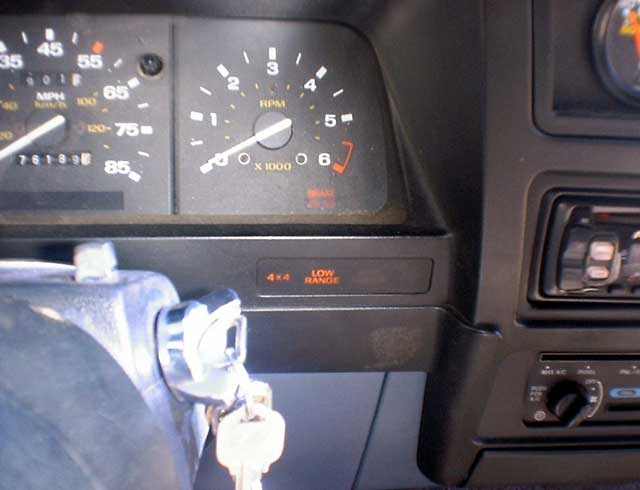
Now w/ the key on, and the transmission in neutral, try all the t-case gears, check for engagement and the correct light. 2wd will have no light.
Now in order to get the correct amount of carpet trimmed, I install the plastic boot plates somewhat loose (they will break if over tightened) for about 2 weeks. After wards, I again removed them and trimmed the carpet out on the INSIDE line. The lines you see in this picture are the ones that are supposed to be there. If done right, you will see two sets. You need the innermost set. Trim too much, and you now have a big problem!
Once this conversion is done, your floor should look like this, and no one will ever know that it didn't come that way unless you tell them!